
What are DNS records?
DNS records are configuration entries inside a DNS zone that define how a domain behaves and where its services are routed. They are used to connect domains to websites, email servers, subdomains, and other services.
Examples:
- An A record points
example.comto an IPv4 address such as192.0.2.1 - An AAAA record connects a domain to an IPv6 address
- A CNAME record points
shop.example.comto another domain such asstores.example.net - An MX record defines which mail server receives emails for the domain
- A TXT record is commonly used for domain verification, SPF, DKIM, or other security settings
In short, DNS records control how traffic for a domain is handled on the internet.
DNS Zone — Managing Records
Where to Find It
Path: Left sidebar → DNS Zones → All DNS Zones → click on a zone name
Direct URL: /dns/[ZONE-ID]
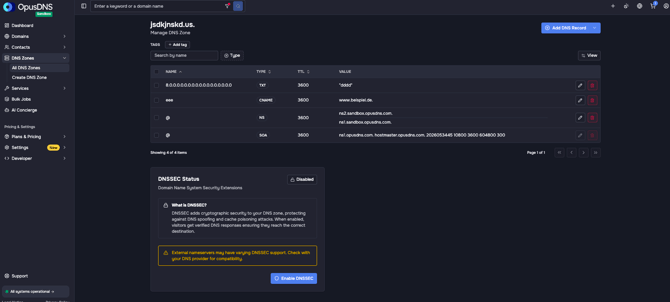
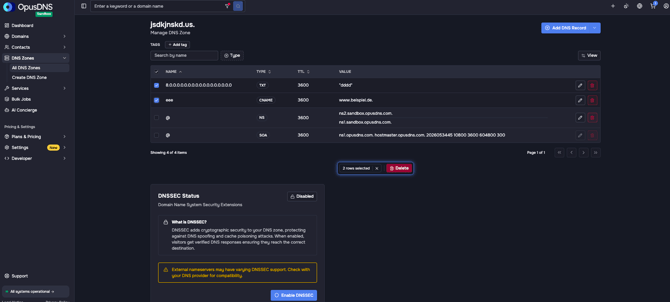
What You'll See
The zone detail page shows:
- The zone name as the page title (e.g., "example.com") with subtitle "Manage DNS Zone"
- A records table listing all DNS record sets (RRsets)
- An "Add DNS Record" button above the table
- An "Apply changes" button (or "No changes" when nothing has been modified)
- A DNSSEC status control panel at the bottom of the page (toggle to enable/disable)
Records Table
The table columns are:
- Type — Record type (A, AAAA, CNAME, MX, TXT, NS, SRV, CAA, ALIAS, etc.)
- Name — Record name (subdomain or zone root)
- Value — Record data
- TTL — Time to Live in seconds
A "Filter by Type" dropdown lets you show only specific record types.
A search box lets you filter records by name or value.
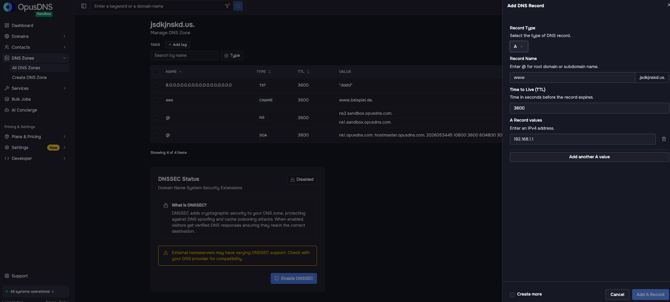
Adding a DNS Record
- Click "Add DNS Record" (button at the top of the table, with aria label "Add DNS Record to [zone name]").
- A form or dialog appears with fields:
- Record Name — Enter the subdomain (e.g., "www") or "@" for the zone root. Placeholder and description vary by record type.
- Record Type — Select from the dropdown: A, AAAA, CNAME, TXT, MX, NS, PTR, SRV, CAA, ALIAS, etc.
- TTL — Enter Time to Live in seconds (e.g., 3600 for 1 hour)
- Record Values — Enter one or more values. Use "Add another [type] value" to add multiple values per record set.
- Select the "Create more" checkbox in the bottom if you want to add another Record afterwards.
- Click "Apply changes" to save. The button shows "Applying..." while processing.
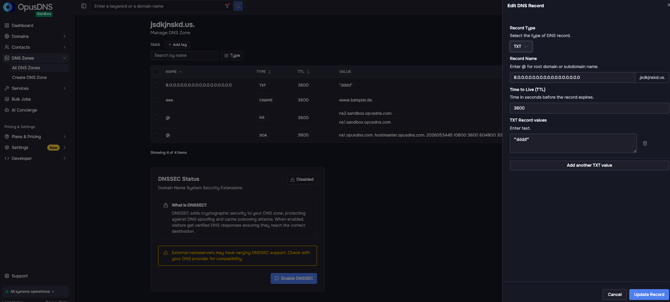
Editing a DNS Record
- Click the Pencil icon on the record row. A form appears.
- Modify the values in the form.
- Click "Update Record" to save.
Deleting DNS Records
- Single record: Click on the red paper bin on the record row.
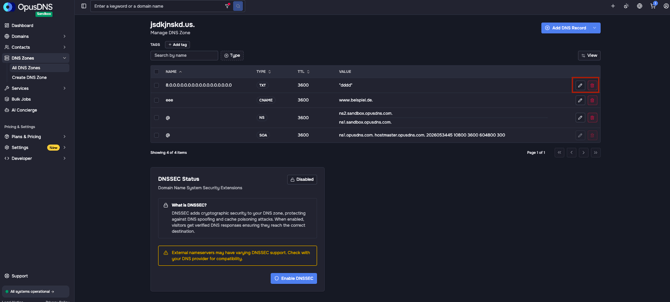
- Bulk delete: Select multiple records using checkboxes, then click "Delete [count] records" in the action menu.
DNS Zone — Managing Zones
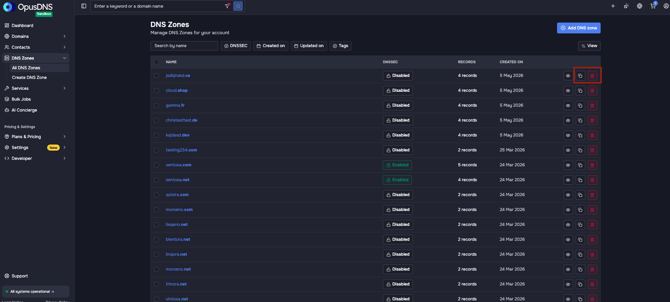
Cloning a Zone
If you navigate back to DNS Zones → All DNS Zones, you can use the “Clone Zone” action (layer icon) in the table row actions to duplicate an entire DNS zone including all existing records.
This can be especially useful if multiple domains use a similar or identical DNS setup and only the zone name needs to be changed.
Deleting a Zone
Click the red trash bin icon in the corresponding record row. A confirmation dialog will appear: “Delete Zone — Permanently remove this DNS zone and all associated records.”
This action cannot be undone.
To delete multiple zones at once, use the checkboxes in the table and the action bar that appears afterward.
