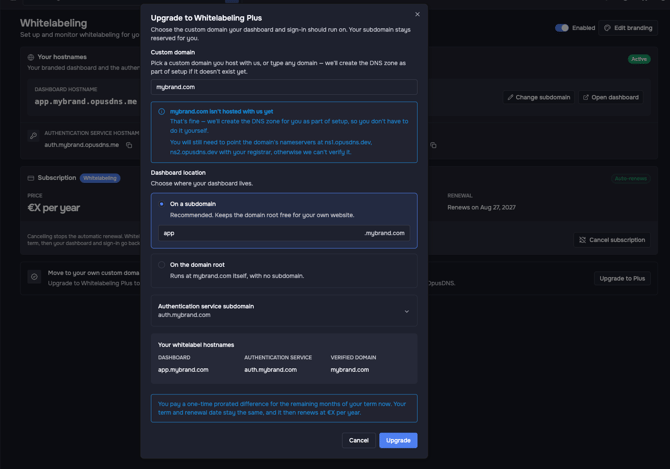
With Whitelabelling, you can offer professional domain management to your own customers using the OpusDNS platform and dashboard — fully adapted to your own brand.
Learn more about Whitelabelling here: What is Whitelabeling and what can i do with it?
Your feedback matters to us.
We continuously improve our products based on customer feedback and requirements. If you are missing a feature or run into any issues while configuring your Whitelabelling setup, please create a ticket in your Support Center. Thank you!
How does the OpusDNS Whitelabeling Setup work?
Our approach to setting up whitelabelling domain management for your business is simple. You can configure everything before making any payment, preview your changes live in the dashboard, and make sure everything is set up correctly without missing any important details (Step 1).
Once you are ready, simply go to the Whitelabelling service, choose your preferred add-on plan, and activate the service (Step 2).
We will take care of the rest. Your whitelabel solution will be set up automatically, and you will receive the links and information to your new, professionally branded domain management platform for your customers.
Step 1: Set Up Your Branding for Your Dashboard, Login Page, and System Emails
To configure your branding, navigate to:
Path: Left sidebar → Settings → Branding
URL: /settings/branding
Here, you will find various settings that allow you to customize the platform to match your brand and requirements.
On the right side, you will see a live preview of your dashboard. Use the selectors to switch between Light and Dark mode.
You can also switch the preview between the Dashboard and Email view to see how your branding will look in different parts of the platform.
The configuration menu currently contains five sections:
- Brand
- Colors
- Content
- Emails
- Assets
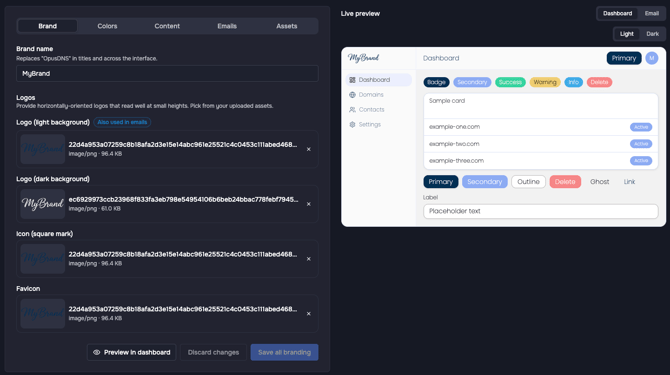
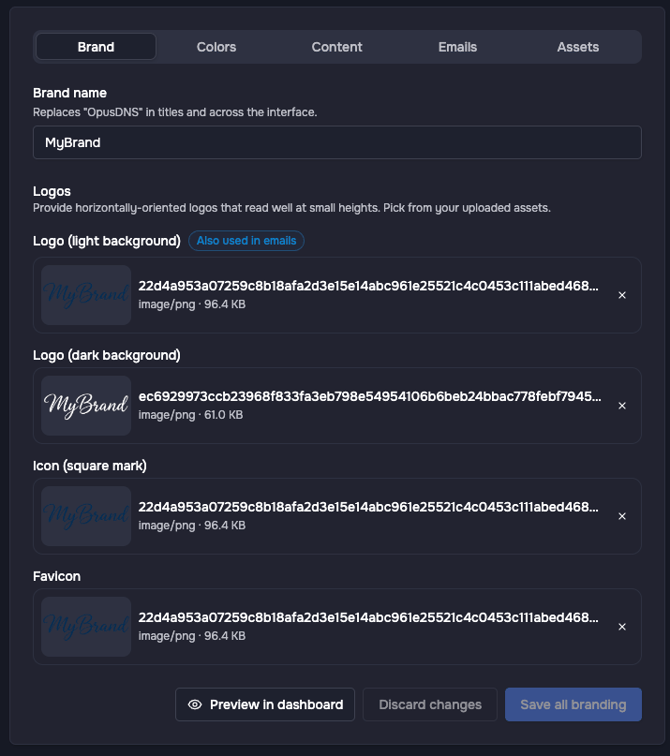
Brand Settings
Under Brand, you can define the basic elements of your brand.
You can enter your Brand Name, which will be displayed throughout the interface whenever your brand is referenced. It is also used as the title shown in your browser tab.
You can add separate logos for your Light and Dark themes. You can also upload a favicon and additional icons to further customize your branding.
Tip: We recommend saving your changes directly after every important adjustment. You can then continue your configuration after your next login. Unsaved changes may be lost when your session ends.
Color Settings
Under Colors, you can start by selecting a theme preset that is already close to your brand. You can also use the presets as inspiration for your own design.
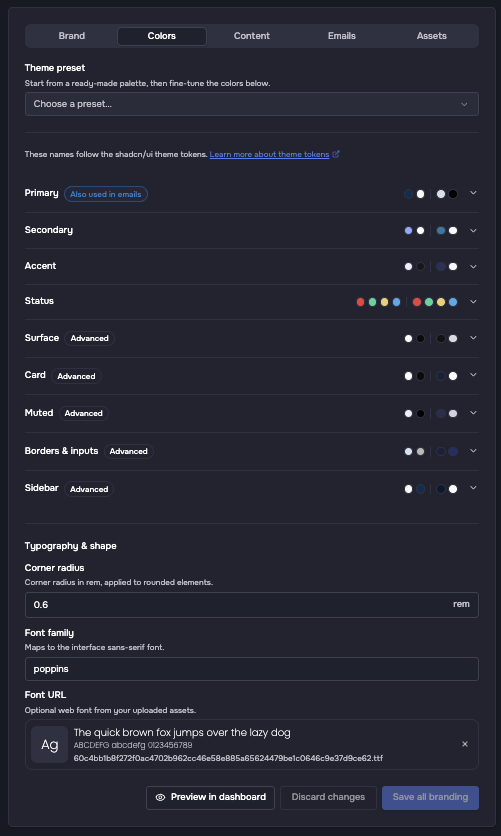
You can then customize the preset using the available color settings for:
- Primary colors
- Secondary colors
- Accent colors
For more advanced customization, expand the respective sections for:
- Surface
- Card
- Muted
- Border & Inputs
- Sidebar
Whenever you change a color, the live preview on the right will immediately show which elements are affected. These settings can be configured separately for Light and Dark mode.
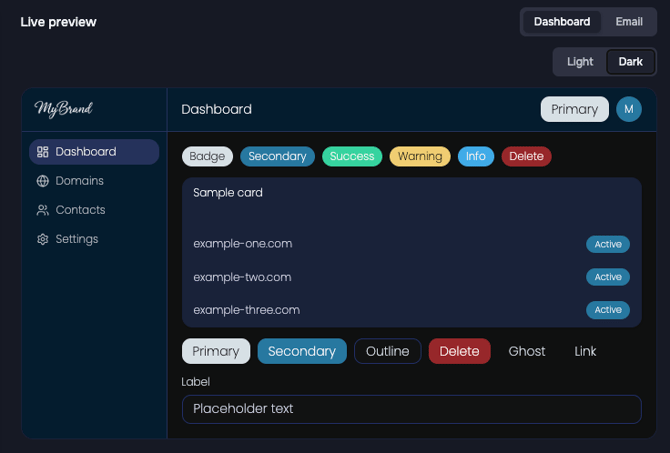
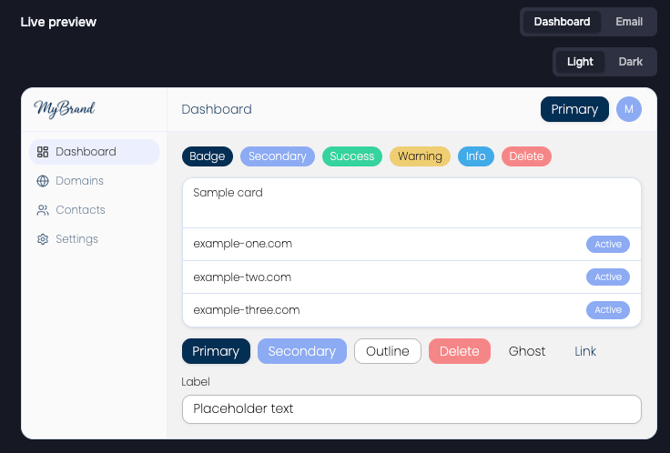
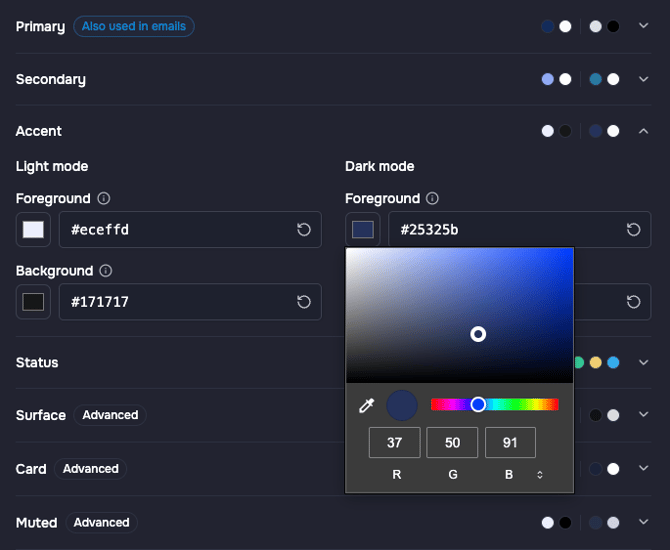
For entering colors, we recommend using HEX values. For fine-tuning, you can also click the color field and select a different color with your mouse. Other formats such as RGB and HSL are supported as well.
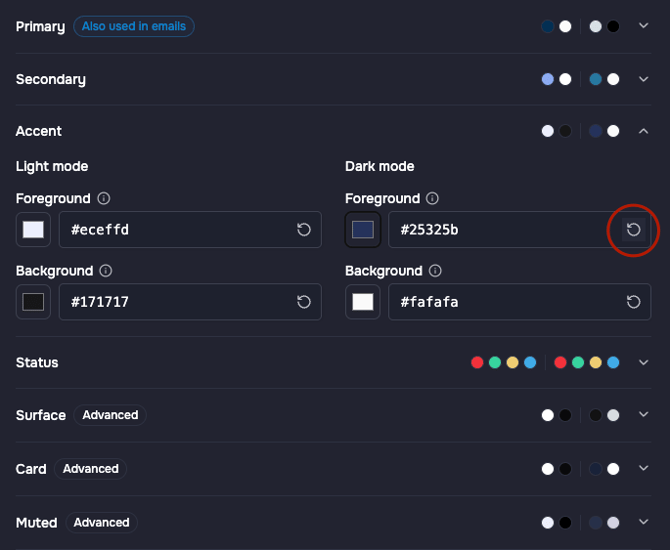
If you want to restore a color to its last saved state, use the reset icon next to the respective color setting.
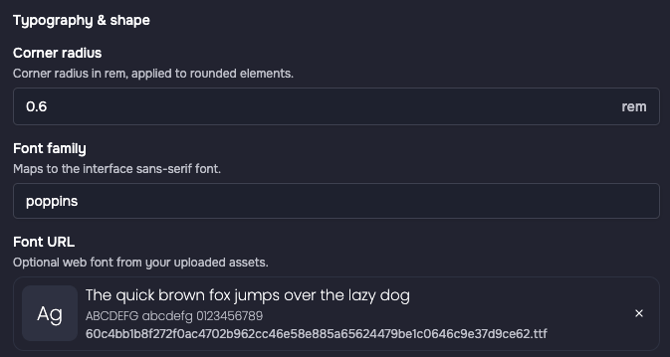
For additional fine-tuning, you can also configure the corner radius and font family. For custom fonts, we recommend using the TTF format.
Content Settings
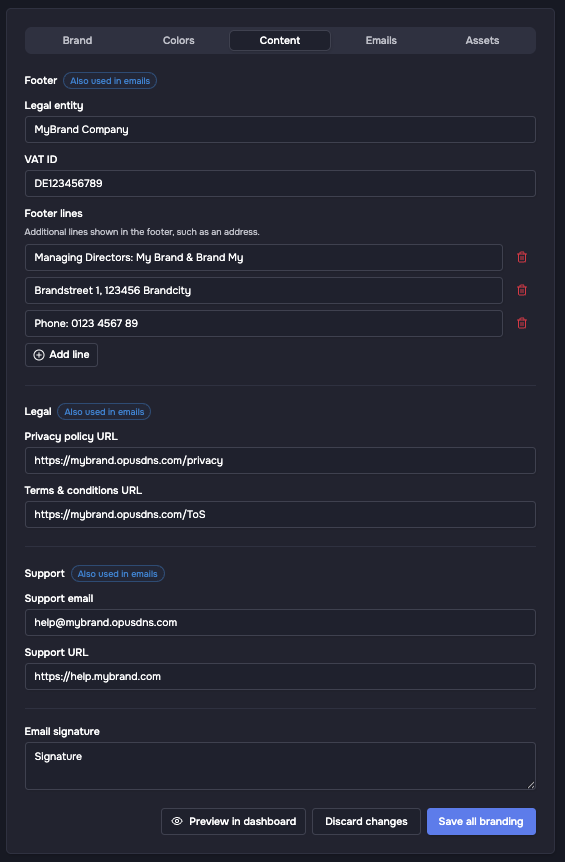
The Content section allows you to provide important company and legal information, as well as URLs for legal and support-related content.
You can configure details such as:
- Official company name
- VAT ID
- Footer lines for emails
- Email signature
You can also add the URLs for your:
- Privacy Policy
- Terms of Service
- Support page
Where are those links used?
-
The legal links you add here are used and displayed in the lower-left corner of the interface.
- The Support links you add here are displayed in the Support section at the bottom of the left-hand menu.
Email Settings
Under Emails, you can further customize the appearance and content of your system emails.
You can configure:
- Email logo
- Primary color
- Support email
- Privacy Policy
- Legal entity
- VAT ID
- Email footer lines
You can also customize the email subject lines separately for English and German.
To preview your changes, switch to the Email Preview.
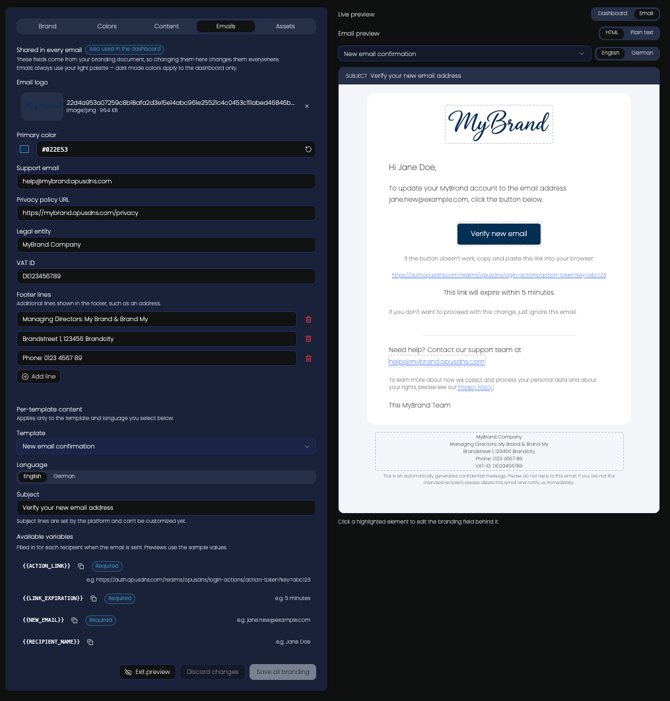
Here, you can preview your emails in:
- English and German
- HTML and plain text
You can also preview the available variables and copy them directly for use in your email configuration.
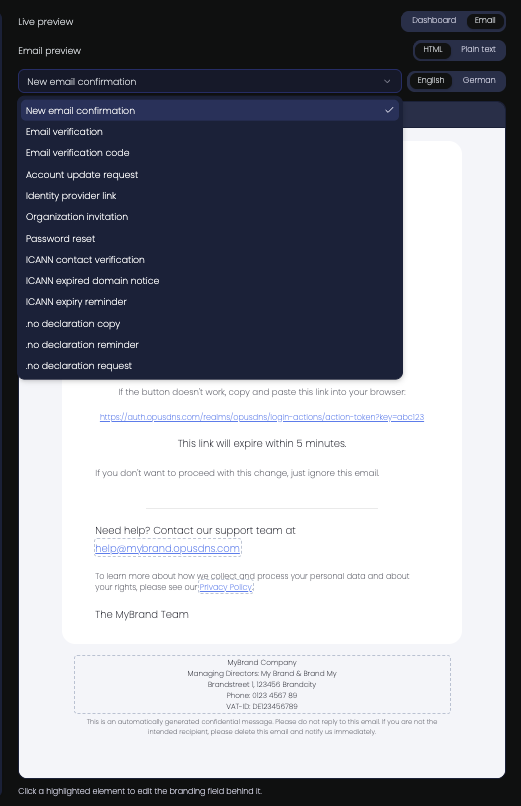
You have several email templates available. Use the dropdown menu next to the email language selector to switch between them and review each template that may be relevant to your setup.
Manage Assets
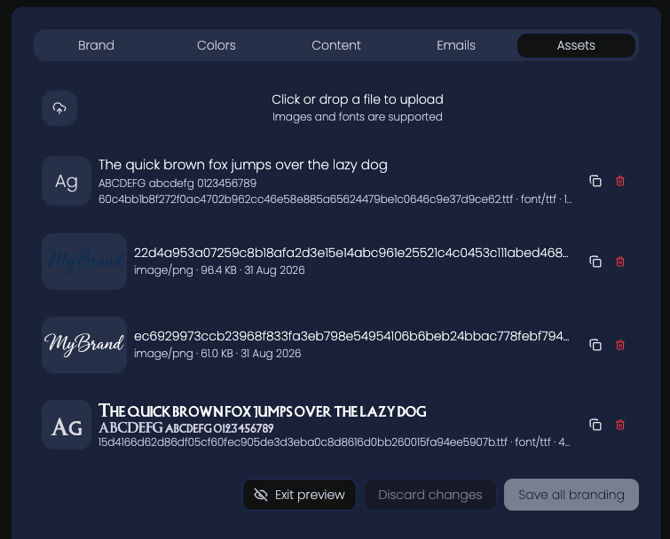
The Assets section allows you to manage additional files used for your branding.
You can upload new assets such as:
- Logos
- Fonts
- Other branding files
You can delete assets you no longer need and copy the URL of a stored asset for use in your configuration.
Step 2: Activate Your Whitelabelling
Once you have finished configuring your branding, make sure to save your final configuration.
You can then click Create Whitelabelling at the top of the same window.
Alternatively, navigate to:
Path: Left sidebar → Services → Whitelabelling
URL: /services/whitelabeling
Choose the plan that best fits your requirements and follow the steps.
Configure Your Whitelabel Domain
Depending on your selected plan, you can configure the domain used by your customers to access the whitelabel environment.
With the Whitelabelling plan, you can host your whitelabel environment on a subdomain under: app.*.opusdns.me
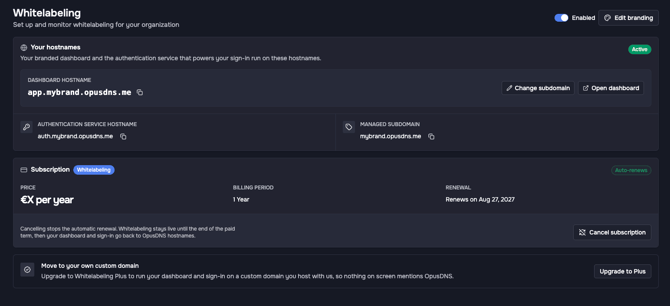
With Whitelabelling Plus, you can use a custom domain or subdomain from your own domain portfolio.
This allows you to provide your customers with a completely branded login experience using a domain that belongs to your own brand.
During the configuration, you will see the hostname of the authentication service as well as the subdomain or domain that is being managed for your whitelabel environment.
Change Your Whitelabel Domain
You can change your configured domain at any time.
For Whitelabelling, you can change the configured subdomain. Click on Change subdomain.
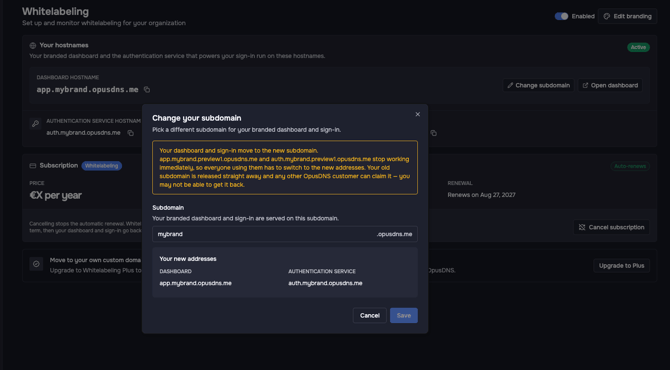
For Whitelabelling Plus, you can currently change the configured custom domain or subdomain only via reaching out to the support team.
But you will be provided with a backup address.
Upgrade from Whitelabeling to Whitelabeling Plus
You can upgrade or downgrade your plan at any time while keeping the selected billing period. You can select between building your platform on the domain directly or on a subdomain.